I have to share this time-lapse that I created yesterday. My big plant is very needy – as soon as it needs water it starts to look “sad” (as I call it). Once I water it, it literally just takes 30-40 minutes for it go back to its original state. So I decided to capture it on video and it turned out pretty cool.
Baked whole apples – Healthy apple pie
Found this video recipe on Instagram and though it was so freakin’ cute that I had to try it for myself. Super easy to make and tastes really good, add some ice cream on the side if you’re not quite that much of a health freak (guilty lol!).
- First you want to slice the top part of the apple off, and scoop out the inside of the apple until it’s pretty hollow and has about 1/2 inch of outer apple left. I used my melon baller.
- With the scooped out apples (remove the seeds and center part) mix together 1/3 cup of butter (room temperature), 2 table spoons of brown sugar and 1 teaspoon of cinnamon.
- Place that mixture back into the hollowed out apples.
- Make your own pie crust, or buy a ready made one (guilty again!). Make equally thick strips of the pie crust and bread them into this pattern or any other pattern you would like. Place on top of each apple.
- Wisp one egg and coat the pie crust with it and sprinkle some brown sugar on top.
- Place in the oven on 395 degrees for about 25-30 minutes, until the crust is light brown and ready. Voila – ready to eat!


For more updates and other pictures follow me on instagram @whipitwithval
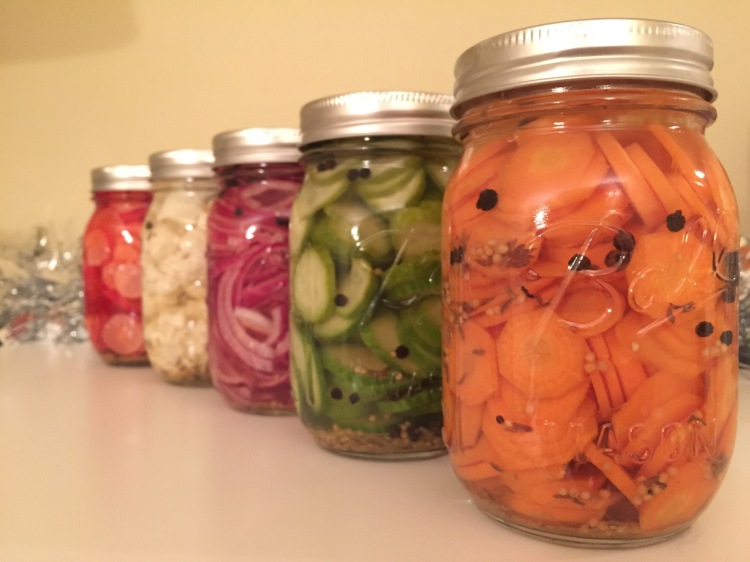
Pickled Vegetables in Mason Jars
I absolutely love doing these types of projects, because it reminds me of my grandmother and how she used to pickle jars on top of jars this time of year (or actually earlier in the fall). She would also make different sorts of jams and other fun things for the winter.
I decided to not only pickle the typical cucumbers and onions that I usually do, but to add some other fun veggies like carrots, cauliflower and radishes.
The recipe for this is EXTREMELY EASY!
- Peal if necessary and chop the veggies you want to pickle. Place them into each jar up to the top.
- Blend the spices you want to use, I basically did 1 table spoon of mixture per jar. Equal amounts of each spice; pepper corn, mustard seeds, caraway, cumin and some coriander.
- Boil about 1 cup of water + 1 cup of white vinegar + 1 table spoon of salt per jar.
- Once the liquid is boiling take it off the stove and pour into the jar that already has your veggies and spices in them.
- Close the lid tightly, let the jars sit on the counter for a bit to cool off and then put them in your fridge for 2-3 weeks.


For more updates and other pictures follow me on instagram @whipitwithval.

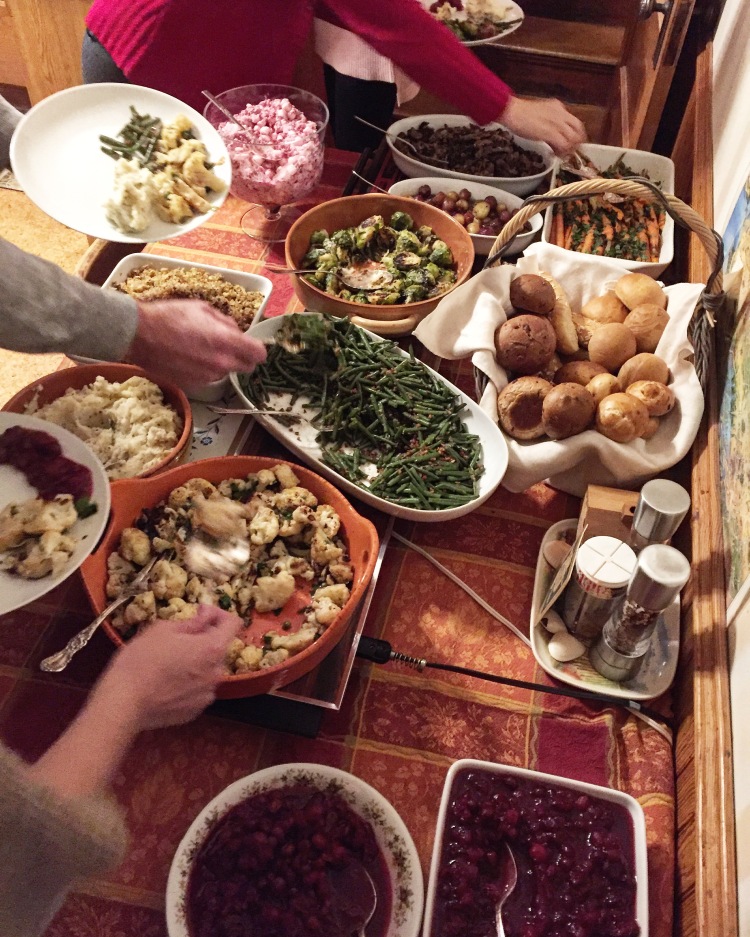
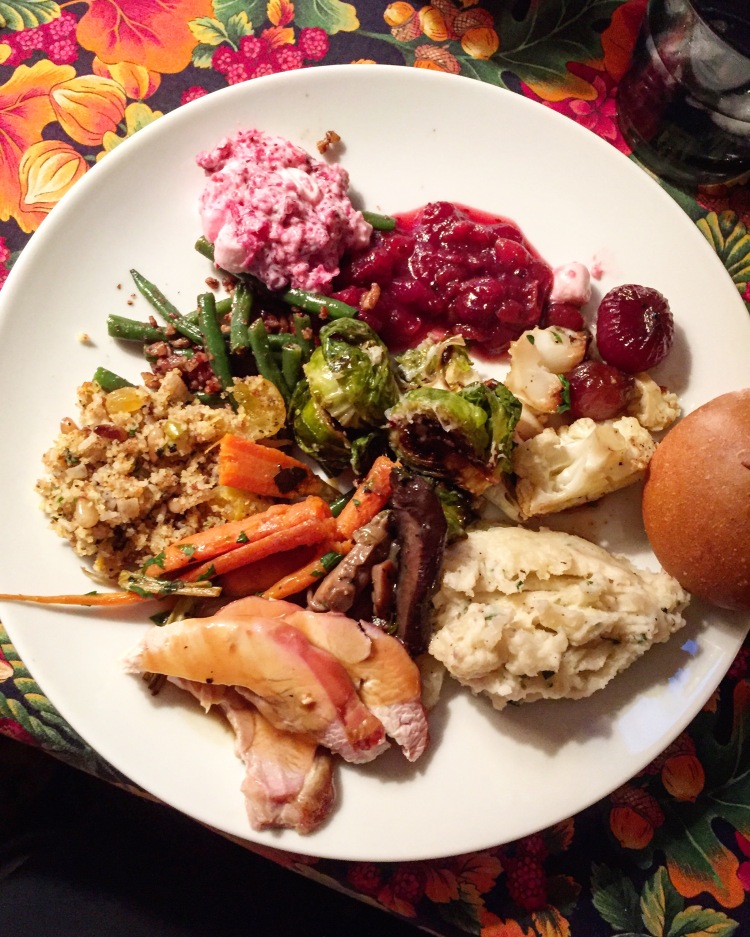
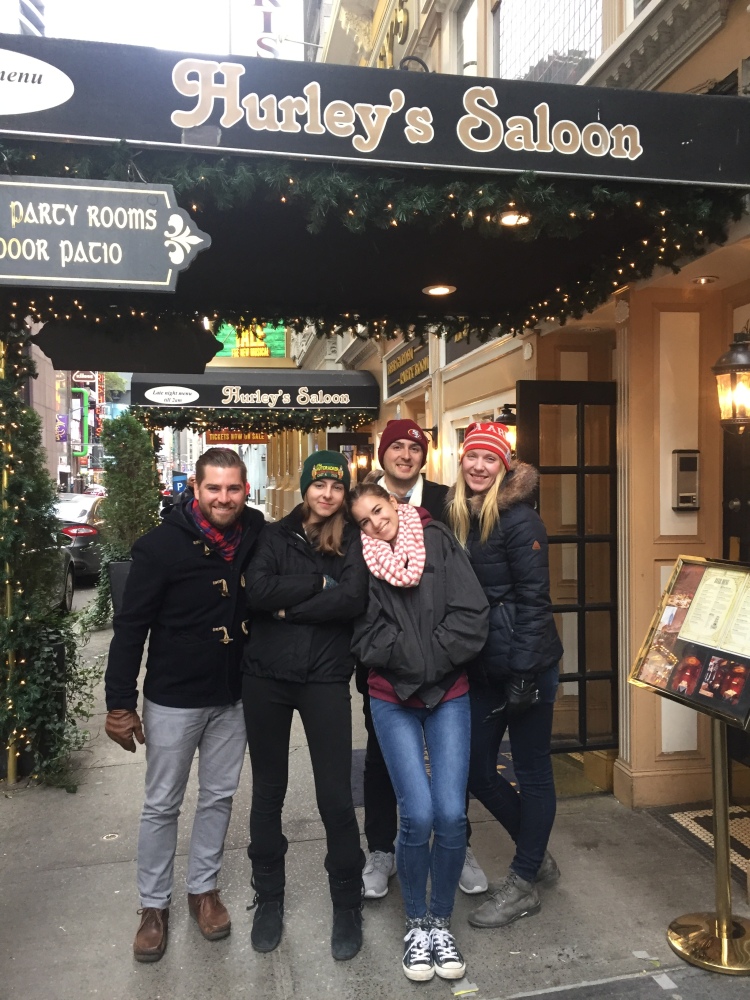
Thanksgiving in New Jersey + Exploring New York + Traveling with a pug
Another Sunday and the day I share a bit more personal content here on the blog. For the week of Thanksgiving we traveled to the east coast and spent it with my boyfriends family in Ridgewood, New Jersey. It was such a lovely time with so much good food, fun New York touristy activities and enjoying the beautiful fall weather that we were lucky to get.
For the first time ever we also brought our puggie, Merlin, with us on the plane and I have to say it was surprisingly easy. We flew with Southwest and I can highly recommend that to anyone traveling with a pug or other small/medium bread. They didn’t check or weigh Merlin, they didn’t even inspect our carrier, but only cared about us having a reservation for him and paying for it ($95.00/trip).


For more updates and other pictures follow me on instagram @whipitwithval.
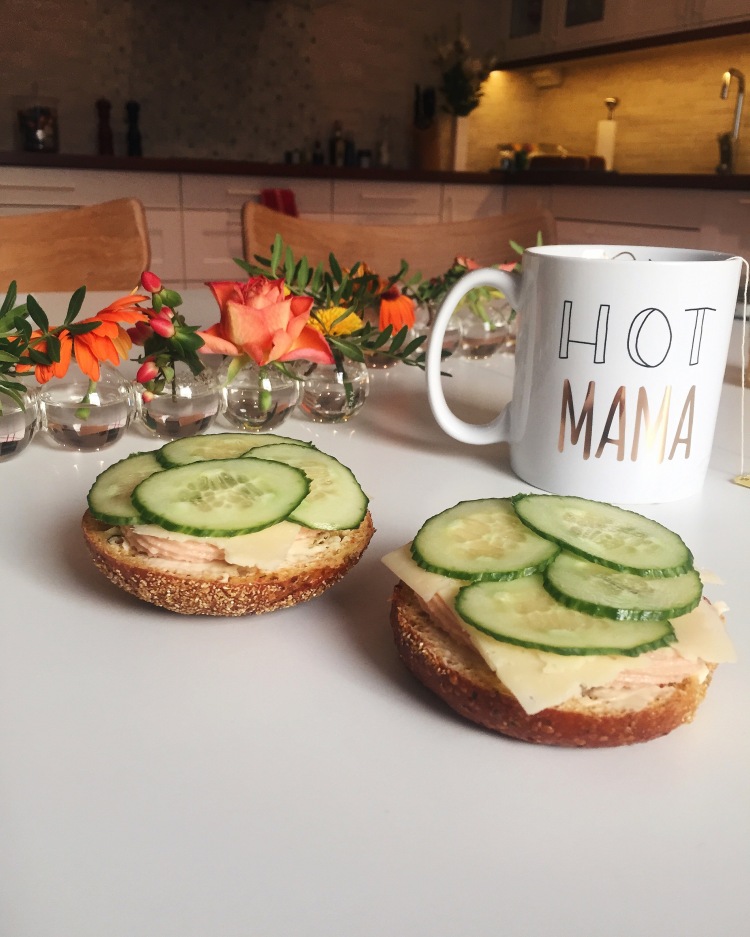
Week in Sweden & Breakfast Diaries
When in Sweden I always eat open faced sandwiches with “Kalles” kaviar in a tube, sliced cheese and cucumbers. It’s just something I’ve always eaten when I grew up and still lived in Sweden – and I miss it terribly when in Los Angeles.


I’m taking a bit of a blog break while in Sweden, want to spend all my time with family and friends, but will be back in Los Angeles in a few days. For more frequent updates visit my instagram page @whipitwithval
Halloween Foods – Carved and Stuffed Bell Peppers
Since I’m not carving any pumpkins this year, just haven’t gotten around to it, I decided to carve something else. Saw this idea on Pinterest a while back and decided to give it a go – carved bell peppers that are stuffed with a ground beef mixture. Turned out so fun and yummy, and I just couldn’t take enough photos of these cute little “pumpkins”. So below is the fairly simple recipe and how I made these Stuffed Halloween Inspired Bell Peppers.
Ingredients needed:
3 bell peppers
1 pound of ground beef (more or less)
1 tomato, diced
1/2 onion, chopped
2 cloves of garlic, pressed
2 tbs chopped parsley
2 tbs Thai red curry paste
2-3 tbs mozzarella cheese
2 tsp cumin
1 tsp cinnamon
salt pepper
Preheat the oven to 350 degrees F.
Cut the tops off the peppers, save the “tops” and set them aside. Scoop out the seeds and as much of the membrane as you can. Place the peppers cut-side up in a baking dish just large enough to hold them upright. Place the bell peppers in the oven for about 5 minutes, this will allow them to get a bit soft. Once done, take out and let them cool on the side.
Heat 1 tbs of olive oil in the skillet, add in the onion and tomatoes and cook for about 3-4 minutes. Then add in the garlic and parsley, sauté for about 1 minute. With the vegetables still in the skillet, add in the ground beef. Break up the lumps in the meat and when cooked for about 3 minutes, add in the red curry paste and all the spices (cumin, cinnamon, salt and pepper). Cook for an additional 7 minutes, or until the ground beef is fully cooked.
Fill the peppers with the ground beef mixture and cook them in the oven for about 20 minutes. For the last 5 minutes, add the mozzarella cheese to the top of each pepper.


If you end up finding this post inspiring or fun, please give this post a like and leave a comment! I’m still new to this blogger community and welcome all sorts of feedback!
This Russian Salad “Beets” All The Others
You might not know this but I was born in Russia and grew up there until I was 7 years old, and still have some family there today. So I absolutely love Russian food and always get so many childhood memories when I make specific dishes, and one of them is the Russian Beet Salad.
This recipe is very simple, easy to make and tastes the best when let to sit overnight (in my opinion).
Ingredients needed:
2 cans of whole beets
2-3 garlic cloves
1 tbs fresh parsley
3 tbs mayonaise
3 tbs sour cream
1/2 cup walnuts
salt & pepper
Grate all the bets, press the garlic, chop the parsley and walnuts. Mix then all the ingredients together until well combined. Eat right away or let stand overnight.


If you end up finding this post inspiring or fun, please give this post a like and leave a comment! I’m still new to this blogger community and welcome all sorts of feedback!
Santa Barbara Getaway, Wine Tasting and Dog Beach.
Another Sunday and time to get a little personal here on the blog. This weekend we drove down to Santa Barbara to spend a night at a few friends house, and really made the most out of our 24h down there.
First out we got lunch at a local spot, then went to Pali Wine Co. tasting room and sipped on some yummy wines. As we all were still in the mood for more wine, we walked down to the pier and did some more tasting at Deep Sea Tasting Room – can highly recommend this spot!
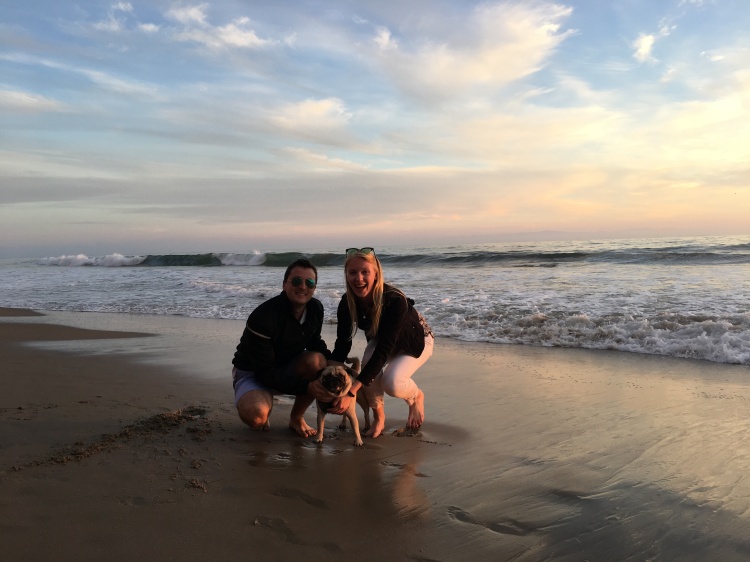
Since we brought Merlin with us on the trip, our puggie, we decided to take him down to the Arroyo Burro dog beach and we timed it perfectly with a beautiful sunset.
Later that night we had a reservation at the newly opened tapas restaurant called Loquita, really good food, not too loud inside and cozy fireplace in the middle of the restaurant. We ended the night with beautiful drinks at this tiki bar next door called Ventiki Tiki Lounge and Lanai.
The next morning, which was today Sunday, we packed our bags and did one final stop at the dog beach before we drove back to Los Angeles. All in all a perfect little getaway!
Here comes a bunch of photos, mostly of Merlin lol, but I can’t help it, it’s just TOO CUTE!

Our host couple to the left and my boyfriend and I to the right.


Wine tasting while wrapped in blankets – perfect California fall activity in my opinion.


 Dinner at Loquita

One last run on the beach before we drove back to LA!
Apple Cake Recipe & Video
I just can’t seem to get enough of apples lately, but it’s that time of year and I say why not! Apples are good for you, they taste amazing and there’s so many ways to cook or bake them. So I wanted to make a fairly simple yet yummy Apple Cake, and below is both the step by step written recipe and a video to show you my process!
Ingredients needed:
Butter (for greasing the pan)
2 cups flour
1 cup sugar
2 tsp baking powder
1/4 tsp salt
2/3 cup canola oil
3 eggs
2 tbs orange juice
2 tsp vanilla extract
3 apples (pealed, quartered and sliced)
1 tbs cinnamon + 5 tbs sugar (mixed together)
- Preheat oven to 325 degrees. Butter and flour a Nonstick 9′ Springform Pan, tapping out any excess flour.
- In one bowl, combine the flour, sugar, baking powder and salt and stir with a whisk until well blended.
- In another bowl, mix together the oil, eggs, orange juice and vanilla. I used an electrical mixer for about 5-7 minutes. Add the flour mixture and mix just until smooth.
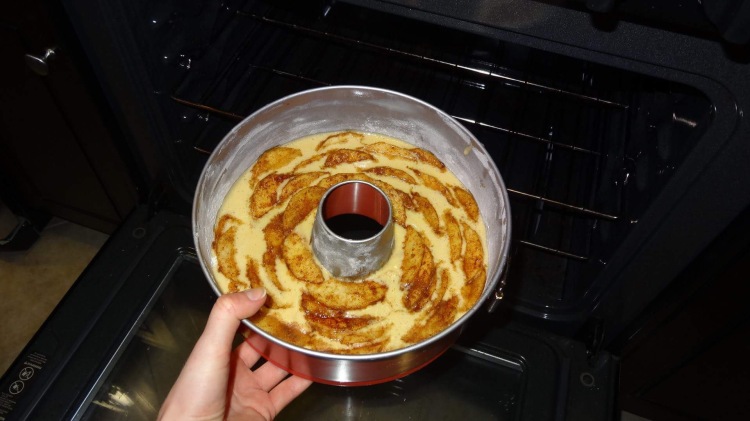
- Pour the batter into the prepared springform pan.
- In a bowl, toss the sliced apples with the cinnamon-sugar mixture until well-coated.
- Arrange the apples all the way around the edge of the cake so that the rounded side of the slices are standing up and the pointed end of each slice is pressed into the batter. Following the same method, make additional inner rows of apples until the entire top of the batter is filled with apples.
- Bake the cake for 1-1½ hours or until a stick inserted into the center of the cake comes out dry.
- Cool the cake on a wire rack for about 30 minutes, then release the cake from the springform (use a knife around the sides of the cake if necessary to loosen it from the pan).
- Cool the cake completely and dust with confectioner’s sugar before serving.


If you end up finding this post inspiring or fun, please give this post a like and leave a comment! I’m still new to this blogger community and welcome all sorts of feedback!
Breakfast Diaries – Favorite Breakfast Ideas for Any Hour of the Day Really!
My absolute favorite meal of the day is breakfast, and below are some favorites of mine from the past few months. And since it’s Friday, or how I like to call it “FriYAY”, I figured we all could use some food pics to get this day started off right 😉

A fresh fruit platter is always a good idea whether it’s summer or winter.
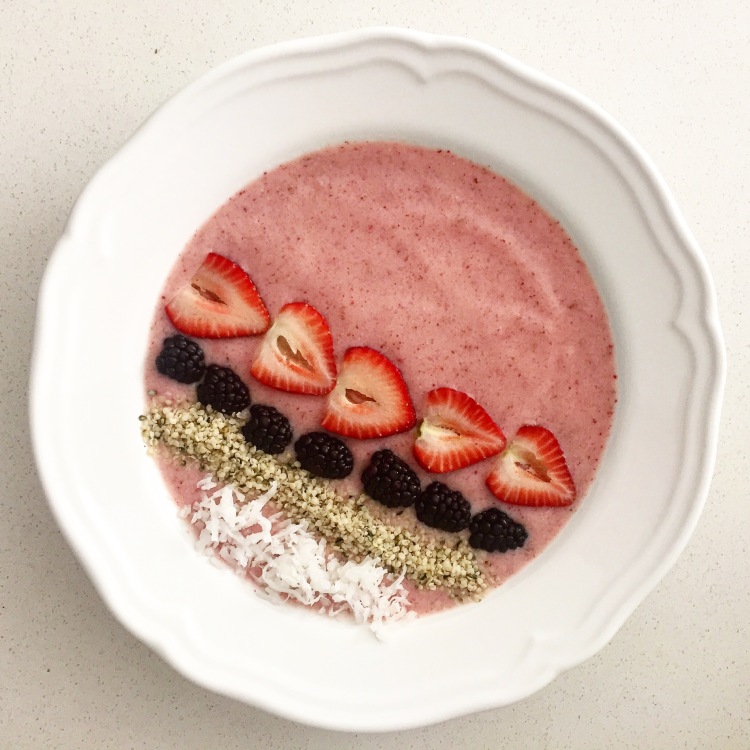
Smoothie bowls are so easy to make and you can top them with whatever you want or eat as is. This is a great one, oatmeal, fresh fruit and a Nespresso coffee – all time favorite of mine!


A classic scrambled eggs a la Gordon Ramsay, bacon, toast and some sliced avocado. 
This one I can eat at any hour of the day, somedays I’ve literally had it for both breakfast, lunch and dinner lol. I know it’s bad, but AVOCADO TOAST people, it’s LIFE!
If you end up finding this post inspiring or fun, please give this post a like and leave a comment! I’m still new to this blogger community and welcome all sorts of feedback!
